In this project I will take you through the steps and method of altering the neck dimension on a standard reloading die. The purpose of this is to maintain neck alignment to the case body for the best loaded round concentricity. It should be relatively easy for anyone with average abilities to perform with a minimum amount of equipment and a small budget. The tools required are nothing special except for the laps, lapping compound and gage pins, the rest of the items are found in almost every home owner’s tool box. The laps run about $10 each, the gage pins are under $3 each and lapping compound can be had for $5 – $8 for a small can and you don’t need much in fact someone you know would probably give you a thimble full.
We all know that pulling the expander ball back through the neck after resizing cause’s neck misalignment or excessive bullet run out so now I want to eliminate that part of the case resizing operation. First we must take a reading of the neck diameter of a loaded round, second we must take a reading of a resized case neck without pulling the expander ball through it. In the photo my loaded round is .2470 and the resized case is .2415, at this time I need to determine how much I want to resize the case for bullet grip, if the die had been inside .004 I would leave it alone. I determined that I want my neck to be resized to .2435 which gives me a .0035 bullet grip; this should be acceptable for my purposes for this round as it will only be used in a bolt gun.
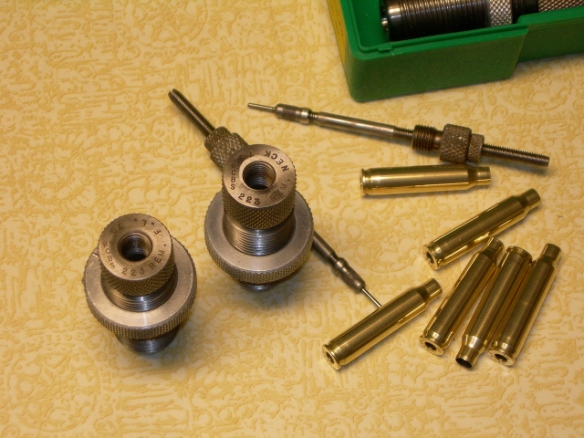
Here I have dies, cleaned de-primed fired brass and my Stoney Point case length gage set up on the calipers, I also want to set the amount of shoulder set-back that I require when resizing the case. I had noticed that one of my shell holders for the .223 family wouldn’t allow me to set the shoulder back after the head space was tightened on my rifle so I wanted to fix that at the same time.
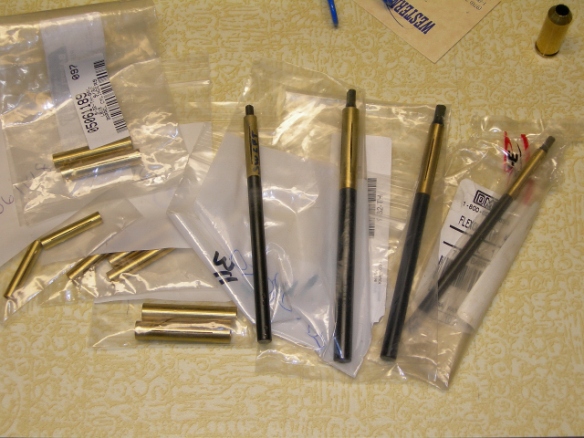
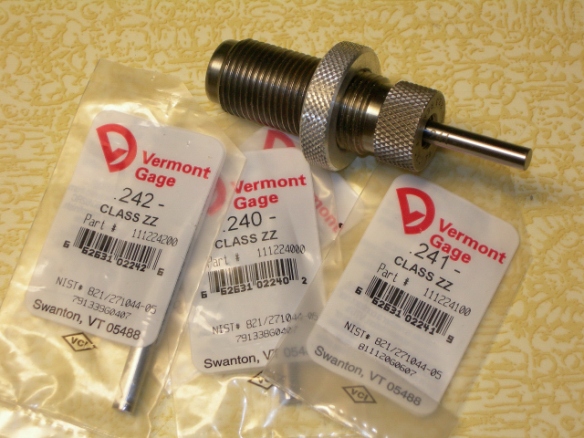
In these photos there are laps of various sizes, I have opened most of my dies at this point in time with the exception of my .280 Remington, next are gage pins which can be purchased individually or in a set, I chose the individual pins for I would have had to purchase 2 sets to cover what I needed and would have cost well over $100 for import pin sets.
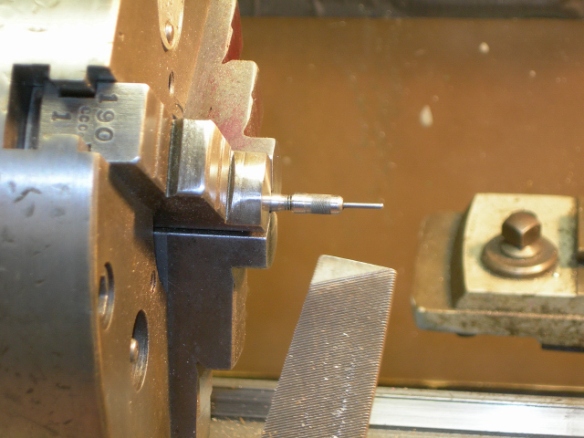
In this photo I have taken the ¼ inch lap and mandrel and reduced the size so it would fit the neck of the die I want to lap. For the neck of the .223 die is .241 and the ¼ inch lap measured .246, all that is required is to chuck it in the drill, drill press or lathe and carefully file it down below the .241 dimension. The next size smaller lap that was available is 7/32, that diameter is .218 and according to the lap spec’s it can be expanded to a .250 dimension but I opted to reduce the larger lap .006 – .007 to perform the task. The photo below shows that I ended up with .2395 and it is now ready to lap the neck area of my die.
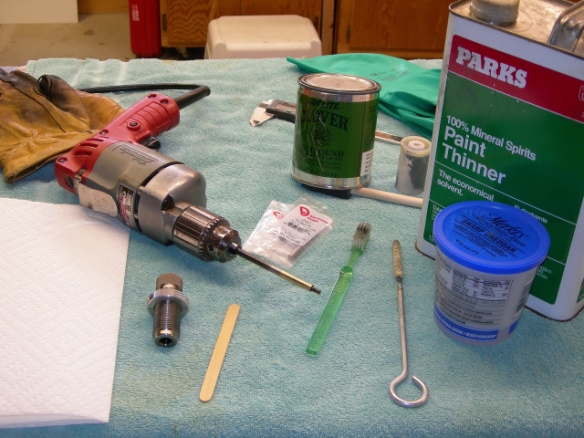
Next we have all the components necessary to perform the lapping operation. I have lapped dies on my lathe, I have used the drill press with equal success but I have returned to the variable speed 3/8 inch drill held in a vise. This method isn’t much different than lapping P&B’s on a Sunnen Hone that I did some 20 years ago, same principle just not working in millionths.
Here we have the drill clamped in a bench vise, lapping arbor mounted in the chuck and I am charging it with Clover 320 grit lapping compound, I prefer using oil base compound over water base, and add some cutting oil as I go to keep it wet. At this time test fit the die on the lap and adjust the lap until you feel a slight resistance, while holding the die on the lap start the drill slowly, moving the die in and out at a moderate speed. If it grabs too much stop and adjust the lap, it requires a feel, you do not want to hold it in one spot, and just keep it moving in and out. You also want to allow the die to slip in your hand some, rotating its position; this will keep you from holding it in one spot.
It is important to go slow, stop and wash out the die, check your progress with gage pins as you go. I check from the inside and outside of the die with the pin to make sure that I don’t wash out one end larger than the other, if you take your time it can be controlled very easily. I use between 300 – 500 RPM for this; it doesn’t really take any more RPM’s than what is required for turning brass case necks.
When you think you are close or even before that, clean the die and test size a case, be aware of the spring back. It is better to take the time to check and sneak up on the desired dimension for if you go to far there isn’t any fix. I would suggest that anyone trying this to purchase some old dies, I found a box of dies at a gun show for $2 – $5 each and used them for practice, it doesn’t take long to develop a feel for how much you are taking out. As of this writing I haven’t missed my target but only one time and that was only by .0005 under, not much and really didn’t make any difference that I could tell.
In the next photo we have to reduce the diameter of the expander ball so it doesn’t touch the inside of the neck at all. I chucked the decaping/ expander assembly in the lathe, I used the lathe only because I have one, a drill or a drill press can be used to accomplish the same operation. You do not want to use a good file for this, use an old file, some emery cloth and reduce the expander .010 to .015, a belt sander or grinder can also be used. If your brand of die allows the removal of the ball and still have the decapping pin in place this operation is omitted.
This photo is the finished die, the expander ball has been reduced in size so it doesn’t interfere with the neck, the die neck area has been lapped and a case resized to show that the targeted dimension of .2435 has been met.
Now to fix the problem of not being able to bump the shoulder, I chucked the shell holder in the lathe and faced off .002 to start. I had no idea at the time what it would take but when I put it back in the press and sized a case, the shoulder was pushed back .0015, a small adjustment and I had my .001 bump.
I have found that the Dillon case lube works the best for FL sizing and have now quit using anything else for this operation. The measurements are different when using something like Imperial Die Wax and this stuff requires more effort to size the case, of course each to his own, use what you are comfortable with.
The laps, gage pins and lapping compound can be purchased from J&L Industrial/ MSC, they are a catalog item, can be purchased separately or in a set. I started with one lap and 4 gage pins to do a 6mm neck die that I purchased for $2 at a gun show, from there I now have 4 different laps and a fist full of pins to cover everything I own. I have also lapped Wilson and Redding die bushings, plain steel not the Titanium Nitride coated ones, you would be surprised how much out of round they are and the size’s are not true. I ordered 3 bushings from 2 manufactures in 3 different sizes, ended up with 2 of the same size and one ½ a thousands smaller, for the price of shipping I decided to try lapping them and now have what I wanted.
This pretty much wraps things up, we have accomplished what I set out to do, improve the die performance, lessen the work hardening of the brass, and improve concentricity of the loaded round. I sincerely hope this is of some benefit to those reading this, keep em tight………Rick
Note:
Anyone considering this modification should take a look at the whole picture. First off the condition or even brand of brass you plan on using and the reason for this is to determine the size you will most need. In my case I keep one untouched FL die plus have as many as 3 FL dies modified to different neck dimensions for a specific caliber, brands of cases, neck turned and chamber dictate which die I use, you may want to also look at body dimensions, dies from different manufactures size differently. For example RCBS old FL dies have small body dimensions with most of Reddingtons being larger, hence lessening the work hardening. (If had to pick one FL die today for my own use it would be Forester, just my preference) I state this now as I have in the past that once the die is changed there is no going back and for the skeptics out there as for the feasibility of doing this modification in the manner I describe you can do your own research. This can be preformed in a number of ways, in a lathe, mill or by the method I have described, I chose the drill for it mimics MBB-1660 Sunnen Hone of which I am most familiar with. (http://www.sterlingmachinery.com/db-files/sunnen%20mbb%201660%20basic%20honing%20machine%20brochure.pdf)
Venture at your own risk……….
Note:
The neck in most cases will have a taper; it is difficult to make both ends of the neck area the same. This is not a major problem, just keep the base slightly smaller…….
The time of dwell on the ends of the hole dictate the shape of the hole, whether it will be washed in the middle or on the ends. A suggestion, if one wishes to have a final hole size of say .245 then lap the hole to say .248-247 to see what you will have to do to keep the hole straight or which end needs to be tight, then go from there. Most of these dies will only require from .002 to .005 to get required dimensions.
Statement:
Repeatable??
There are variables, first and foremost would be your own abilities, go too far and it is junk. There are people doling out info on very popular forums that I question and they seem to not be shy at making statements of which they do not document for everyone to see. Text and anonymity boost egos and after that it gets difficult to sort out the truth. Everything on my site I have personally done, I state as to any pitfalls that one may incur which I have but there may be some that ultimately didn’t show up. I have spent a lifetime diving into stuff that in many cases was over my head but I wanted to learn and if anyone is not willing to accept failure then it is best left to someone who is. What I portray in my pages is basic information for those looking for a how to, a peek at tools and methods that work to accomplish a certain task without breaking the bank.
I spent 30 years in ID-OD precision grinding, most of which was in set-up or engineering, we lapped mating surfaces to millionths of an inch;
As for accuracy in all cases that I can remember (hole lapping) the work was either hand held or in a floating fixture. The object of that is to allow the lap to follow the existing hole.
It seems there was a lot of black magic involved to make things work but I loved it and every day was a learning experience!
Lapping an existing hole is really quite simple, the lap follows that hole, and it doesn’t change its location, if the hole is off center it will still be off center when finished lapping. There are laps made that flex to follow a tapered hole, they float to the contour of the surface being lapped or honed. The method I used to open the neck area of a die is more than adequate for the task and repeatable, as for the body that is a different story; I was reluctant to post my method but was asked how I accomplished opening my die. Without spending big dollars I managed to open the body of that die in the fashion described, would I do it again??? Not likely but I will never say never.
To make a statement, if you want a die that will give you the best concentricity it will be a FL die with a lapped neck dimension to your specs and eliminate the expander ball.
When I lap the neck I make sure that the inside or the base of the neck is smaller than the open end, this insures that it is uniform for its entire length when sized. We and this is a group of shooters from different disciplines have tested all the dies mentioned. I still use a couple Wilson bushing hand dies and two threaded bushing die, those I made myself for my 30BR and PPC. I purchased a highly regarded manufactures 30BR bushing FL die; it was a POS from my tests and the last one I ever purchase, I don’t care who makes it, it is a waste of money but then this is my opinion and no one else……….. bushing dies add a variable to the equation, variables are what one wants to eliminate.
FYI, in the past anyone could send a die back to the manufacture and have it opened up to whatever dimension one wanted, now there are a couple of them that no longer offer that service, the reason appears to be that they now are pushing the bushing dies they produce.
Best of luck……
Rick








Where do you buy your lapping arbors from? This seems like a great idea thanks for the article.
Dave
Pingback: Carbide Neck Sizing Dies - Shooters Forum