Point-up, the final step.
This last step in forming jacketed bullets is some what self explanatory other than setting the length. The only experience I have had is with the steel dies, they require more lube than carbide dies, I won’t get into the technical details between the two other than the life of steel is short compared to carbide. For most individuals steel will last a lifetime when making bullets for you and maybe a couple buddies, the cost difference between the two is considerable though, for that reason I chose Blackmon steel dies. With this set-up it mounts in the reverse of other manufactures dies, it doesn’t require an ejector frame as others and the die mounts in the ram instead of the head. The die set-up comes with a replacement ram for the press you choose and at that time you will be sent a drill guide to modify (drill a hole for the ejector pin (see pic)) the press. At the present time I have 4 presses modified for bullet making but only use 2, as most I began with one press but soon found that multiple presses just made things easier.

Point-up Die, Ejector Pin, Punch Holders & Press Ram Assy.Modified Press, shows knock out pin installed, the only modification
Once the dies are set to one press they normally do not require adjusting other than when a new batch of jackets are obtained and this is why one should order larger quantities to eliminate the variation. Now, I have one press set to point up 30 caliber bullets and that is all it is used for, the dies remain in that press, the second press is used for all subsequent operations plus all 6mm bullet making. It is not necessary to do things this way, when I started I had only one press, I had only one punch holder so when changing jacket length and core weight I was constantly sticking bullets in the die. Over time you learn what to do to stop this from happening or I should say most of the time, so when I added the second press I dedicated the first one to point-up. Today I have added 6mm dies sets, made an array of punches, made extra punch holders so to eliminate much of the set-up time required in changeovers, of course all the extra stuff can be obtained from Bullet Swaging Supply.

My 2 Dedicated Bullet Presses
Every one of us has certain ways to do things, mine may not be the best or the right way but I seem to have success in my madness. With that said I start with warming the die, I remove it form the ram, put it in a Ziploc bag, place it in warm tap water for a couple of minutes, this is where one will say this is weird but I have found it works better for me than a heat gun or hair drier. As bullets are swaged the friction will warm the die, things become more consistent so with pre-warming the die one doesn’t have to wait to get to that stage. With the dies I have the meplat cannot be closed completely, I am told that some dies this is possible but I do not know that for sure. The ejector pin in Blackmon’s 30 Caliber die is .072 in diameter which is probably needed for this size bullet in steel dies for it requires a fair amount of pressure to eject. I have a tendency to go light on the lube thus requiring more force to eject the bullets; this is why I advocate wetting your fingers with a small amount of lube before starting this operation, it will help to insure that you do not stick the first bullet.

Removing Finished Bullet
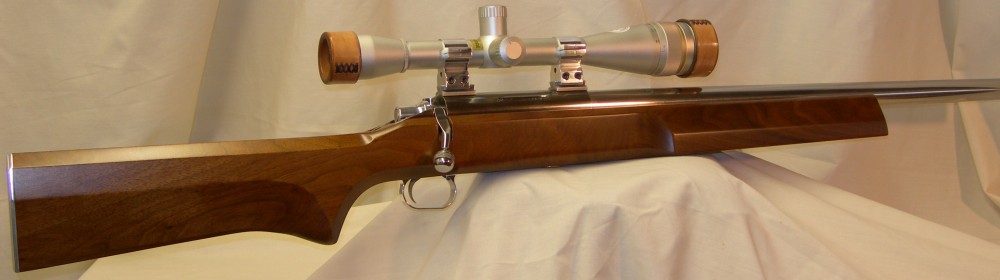
The end………..well I meant to say that the finished product has finally arrived, a complete, 30 caliber, 118 grain, 7 ogive jacketed bullet made form a J-4, 1.00 inch jackets.
The attached YouTube video is to demonstrate the ease of the point-up process. You will have to disregard the movement of my press for I didn’t want to drill holes in my antique bench to mount the presses, it also makes it much easier to move the process to another location if needed.
I prefer washing the bullets after point-up; I use denatured alcohol in a clean peanut butter jar, swish them around, drain them in a canning strainer then place them on a towel to dry. If you are particular on how things look, not to say that the bullets look bad but a little polishing makes them look like a million bucks. If you haven’t tried my method of polishing bullets it would be a good time to try it, I think you will be amazed.

Finished Bullets
Notes:
As I think of things that may effect or help the process I will post in this section, there are things that I do which I may have missed sharing.
(1) In core swaging the most common problem is consistent core weight; I once read that double swaging cores help this problem. Over the years consistent core weight plagued me so I tried running them thru the second time, it was time consuming and difficult at best until about 5 years ago. One can double swage a core without ever removing it from the die the first time if done properly. First and the most common fault is not hesitating at the bottom of the stroke, when you hit the bottom count one two then do the up stroke, stop when the core comes flush with the top of the die then take it back down, count one two retract and eject the core, that’s it. The hesitation at the bottom is to allow the material to move, just hitting the bottom and pulling it back doesn’t allow enough time for everything to relax or release tension. The double swaging comes into its own when using pure lead or when one has not done a good job of cutting cores to a specific weight. Now take into account that the weight will be slightly shy of the desired target weight doing the double swaging, how much depends on your tempo and the integrity of your press. It is my belief and many others also that a couple of tenths one way or the other in bullet weight doesn’t mean anything in short range Benchrest, when you can shoot a 112/ .925 and a 118/ 1.00 intermixed into the same hole it isn’t something to really worry about, take it for what it is worth, do your own tests, I’m just putting it out here.
