
Brass Annealer (2013) Posted in 2014
First off this is not my design, I had an idea in my head of what I wanted, didn’t really need anything automated so doing a search on You Tube ran across this single stage manual brass annealer that some one had built. My reaction was……This is just what I was looking for!!! The end of this video there was info on what motor was used and where it was obtained so this is where I started, procure the parts needed first. EBay I found a 12V – 60 RPM motor needed for spinning the cases, ordered it for a total of less than $9 delivered. Now I have the motor I needed a power source, in a bargain store I found a couple 12V chargers for $1 each, figured I should have an extra. The toggle switch I acquired from my local auto parts store, if I remember right it was around $5 so now I have maybe $16 or so invested but still needed a pair of torch heads. Down to the local Hardware store I procured a pair of propane heads for $11 each, I already had the propane bottles at home so now I have all parts needed for my build. (You really need all components for the build before starting, especially if no dimensions are supplied)
All of the aluminum for this build I had on hand, some used and some new but didn’t have any dimensions to start with. From watching the video countless times, gauging sizes from the shell casings and the hands of this person I started my mock up with cardboard, glue, blocks of wood and modifying as I go.

Annealer in it’s first set-up
Rough dimensions;
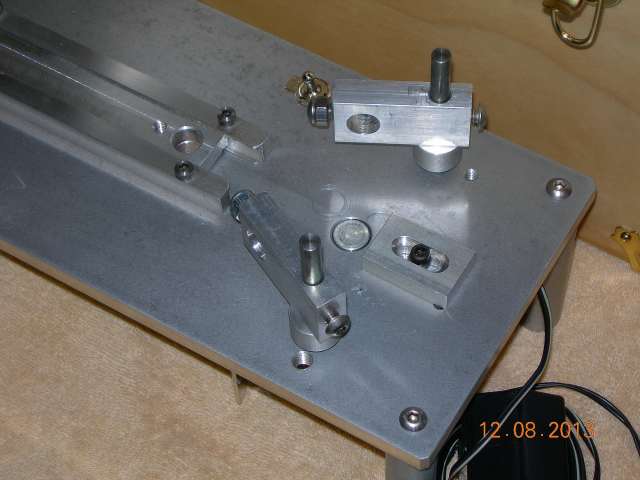
Top – 14” long X 6”wide X 3 /8” thick aluminum plate
Legs – 3 ½ “ high X 7/8” round stock
Cartridge slide – 7” long X 3/8” X 1” bar stock
Cartridge slide is drilled one end for .473 cartridge base and the other .375 to cover the .308 and .223 family of cartridges. Stroke length of the slide is 3 1/8”.

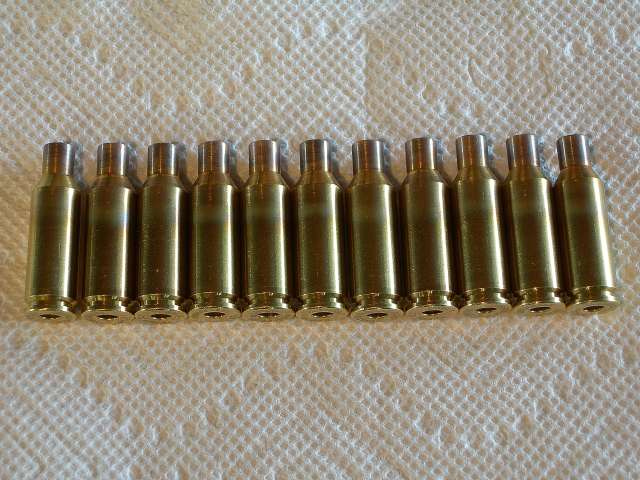
First run of cartridges
As seen in the above two pictures this is my first set-up for a run on 600 .308 cartridges, I tested maybe 10 cases before committing to this run. I use the Tempilaq for the initial timing of the process then use the count down method. I have thought about installing a digital timer that would be triggered by the slide forward position but really haven’t had a problem annealing cases in it’s current state so that is on the back burner for now.
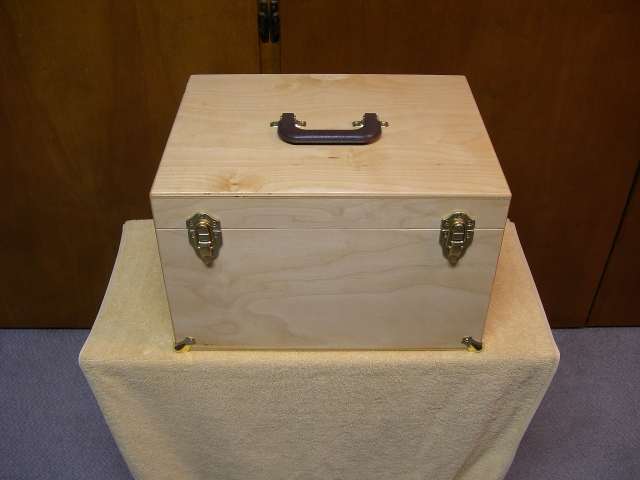
Now at this point I have all this “Chit” to corral and keep in one place so it needs a case, so to the table saw with some Baltic Birch plywood and viola…….
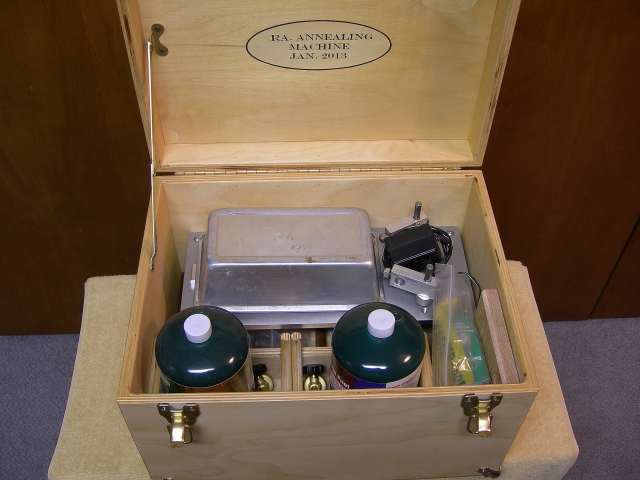
Case with everything needed to anneal cases
Waiting until everything is built and tested before building a case is far easier than guessing what one would need besides everything is now packed into a tight package.

In the next pic I have turned the annealer up side down to show the bottom arrangement. This shows the motor bracket, motor w/ film canister cover, cord retainer and the heat shield for the motor. The heat shield was an after thought so hot cases didn’t sit on the power cord, motor or switch it also serves as a stop for the bread pan that catches the hot cases.

And last is a close-up of the business end……..First I decided on a stroke length to keep heat away from my hands, then everything centered so the motor could be drilled and mounted. From that the front and rear stops were added, the one at the motor is adjustable and would be removed when changing cartridge base sizes. Next the pins for the torch heads were located drilled and tapped for two positions. After all that came the torch holders, I had to alter them 4 times before I was satisfied with the flame positioning but now have 2 sets for different applications. For adjusting the height my thoughts were to have some shims for specific cartridges or family’s so they always line up….I made these shims from the 7/8 round stock, one for the PPC/ BR cases and the other for .308/ .243 length, all the rest can be adjusted with washers. If at some time I need to anneal Magnum rifle or pistol cases all that needs to be done is make another slide bar to fit the head size.
So when all was said and done the out of pocket cost was under $50 for most of the materials were on hand. It all fits into a 16”x 12 ½ “x 10 ½ “ case, go anywhere and set-up using a 12V power from a 110 outlet or it could be hooked to a 12V battery. For the amount that I would use an annealer I just couldn’t justify purchasing a commercially made unit.
I finally figured out some of the new systems and did a video but after all said and done the video is not of quality that I had hoped for. At the this time I ran out of brass to anneal so it will have to suffice until I can make another, even with the poor quality it should depict the operation of this annealer…
http://www.youtube.com/watch?v=apaTDuKGr6o
I built this annealer in the January/ February of 2013, it really shouldn’t have taken this long to post (2014) but I now have lost my pictures for the third time plus a computer. I’m not sure just what is happening, some miss-Q on the key board and viola they are gone to some graveyard in the far reaches of my computer then the computer crashed and couldn’t retrieve any of my email but did get my pics back………very frustrating plus the new operating system could not use my picture program so I am learning a new one…all in all it is getting better…
Last run of PPC cases

Hi great reading yourr blog